
If you think you need ultra expensive photo equipment to take high resolution photos of stars and nightscapes, think again. With some very easy/cheap equipment, you can get great pictures of the night sky!


I captured these pictures from my backyard with just a tripod, DSLR, zoom lens and patience. So how can you do the same thing? Well, let’s go over the steps that you need to follow to do the same thing.
[the_ad id=”14040″]
Step 1 – Camera Settings
Depending on the time of day, your camera is going to need to adjust a few settings. First thing first, avoid relying on ISO to see more light. ISO is an artificial filler and it may look decent on your screen, but the pictures will be full of noise.
Secondly, play with different exposure times to see what time works best for what you’re trying to capture. Bear in mind, exposure time means you’re allowing more light into your shot. So if you’re trying to get pictures of the moon, you need quicker exposure times, for darker areas you need longer etc.
For example, the shots of the moon that I captured above were using these settings: Taken around 7:00PM, 4” exposure time, RAW and at f2.8.
Last thing on your camera would be the amount of pictures. If you’re trying to capture a Galaxy or cluster of stars, you’ll need to take about 200 successive pictures.

Step 2 – Find as much of an open space as possible
If you have a big enough backyard then that’s a good place to start. Avoid places that have trees and a lot of wind. While it can be awesome to capture a mountain or a tree with stars behind it, wind will ruin the shot.
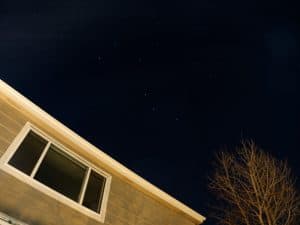
Essentially, just find as much open space as you can, or point the camera in a way that avoids bright spots like house paneling.
Step 3 – Trial and Error
As long as you follow the first two steps, there’s not much else to really recommend. There’s a few apps and services you can use to stack shots on top of each other to create galaxy shots and clusters. But that takes a little more practice and technical knowledge.
For now, just follow these steps and see what you can capture! You’d be surprised what you can do with so very little!
For more DIY projects and ways to stay busy, stay glued to here at Scoophash with us!